How to save Revision Cloud and Revision Table in a template (Applicability HyDraw CAD 2020/2021)
Steps to save Revision Cloud and Revision Table in a template:
-
Open HyDraw CAD.
-
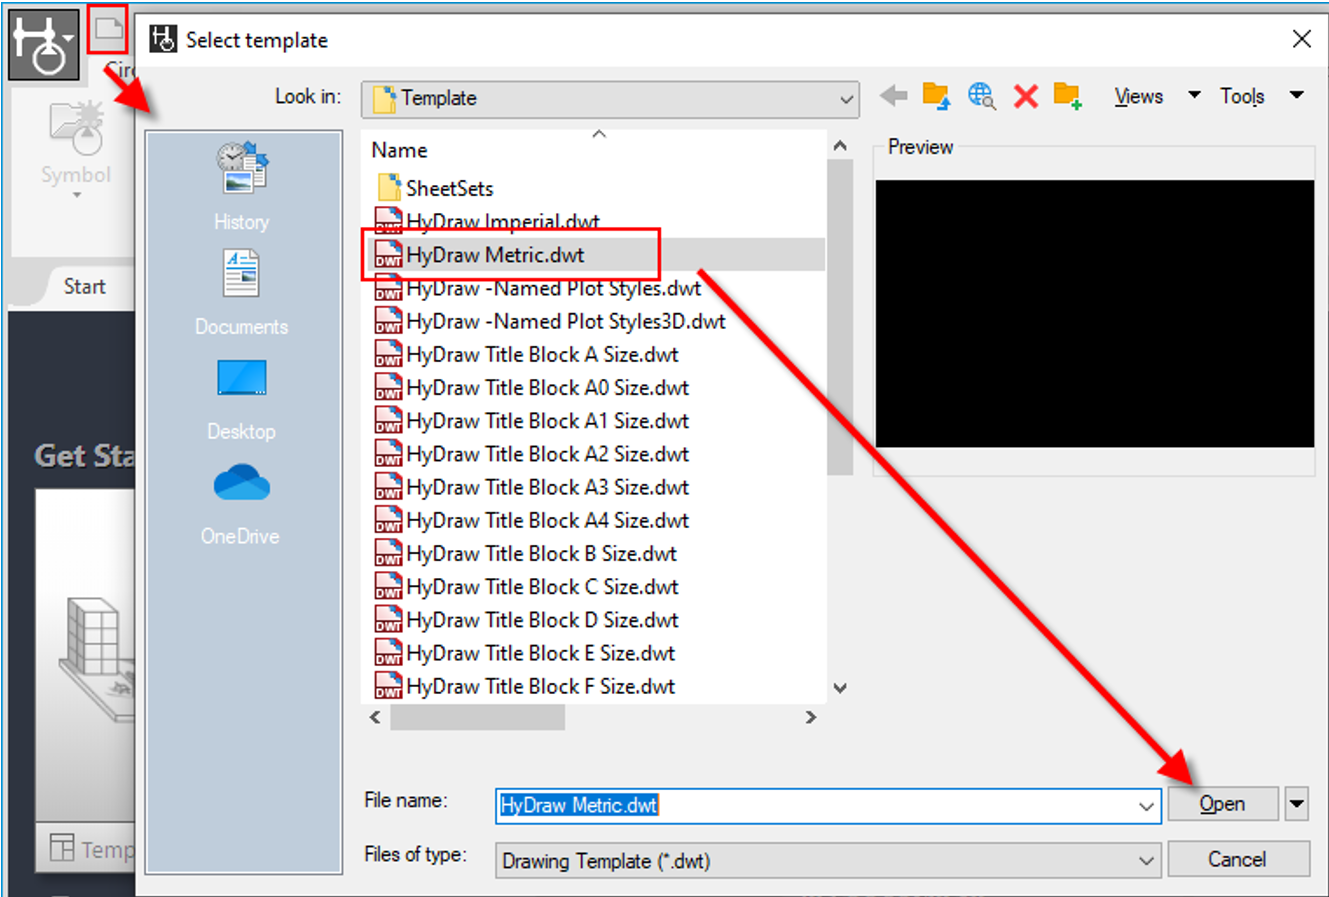
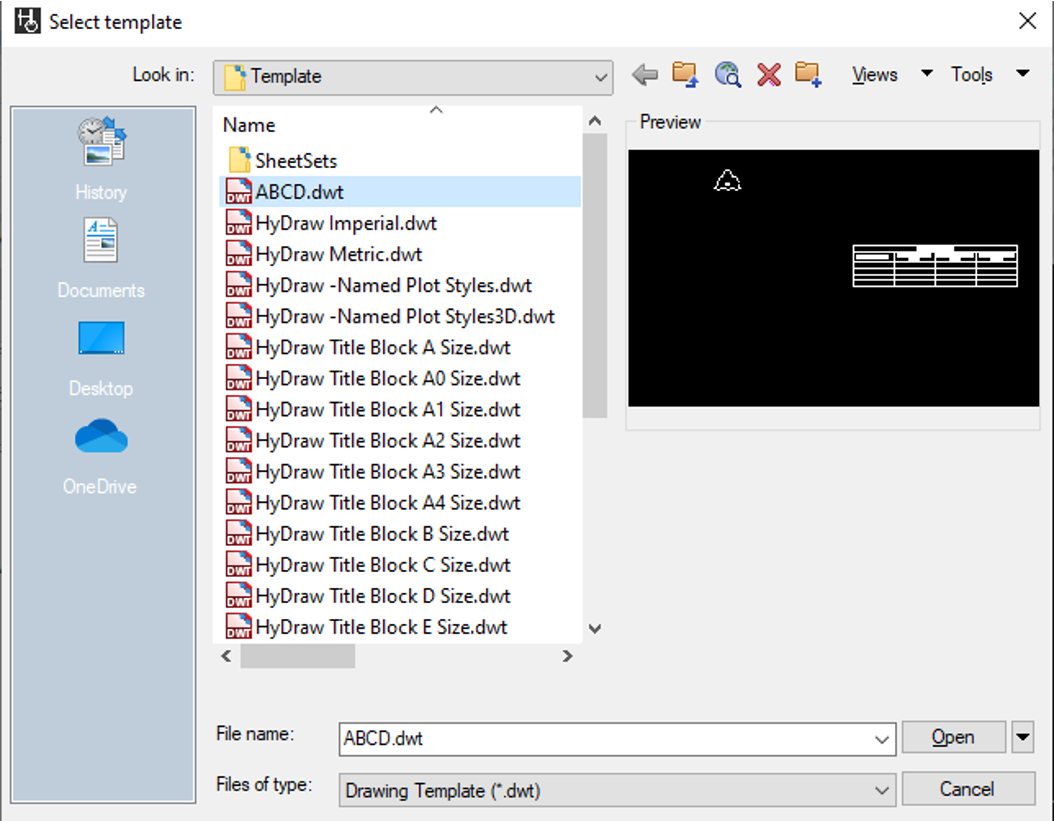
Click on New.
The Select Template dialog displays.
-
Select the template and click Open.
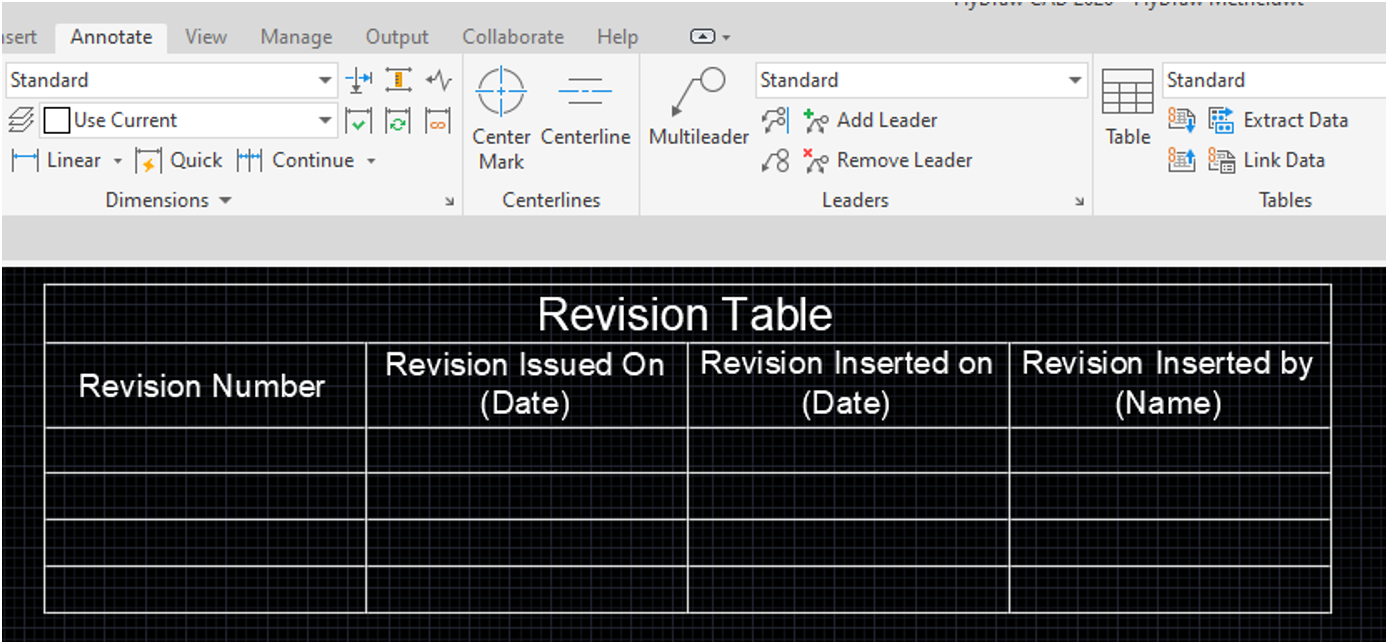
4. Go to the Annotate Ribbon menu and click Table.

- Customize the table as per the requirement and insert it in the opened drawing.
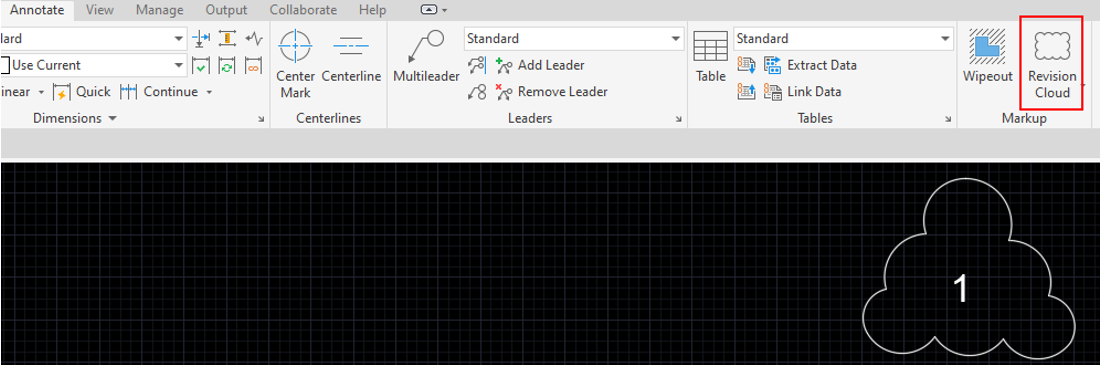
- Similarly, create the Revision Cloud from the Markup option under the Annotate tab and insert it in the same drawing.
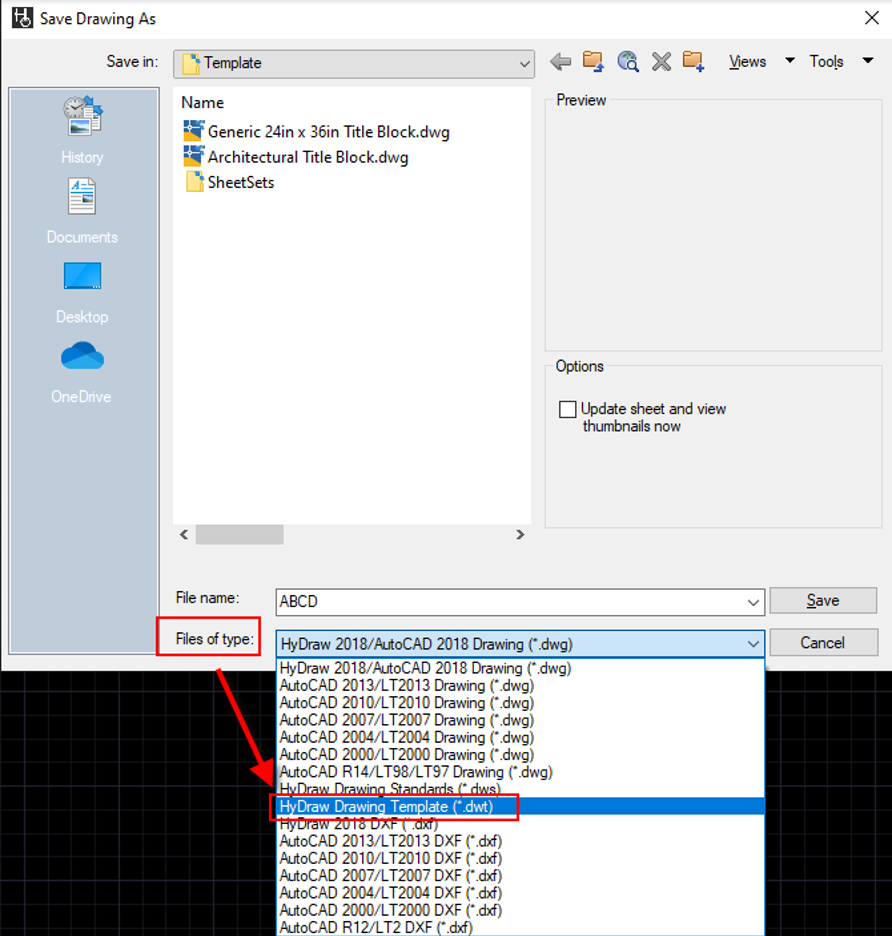
7. Click Save As.
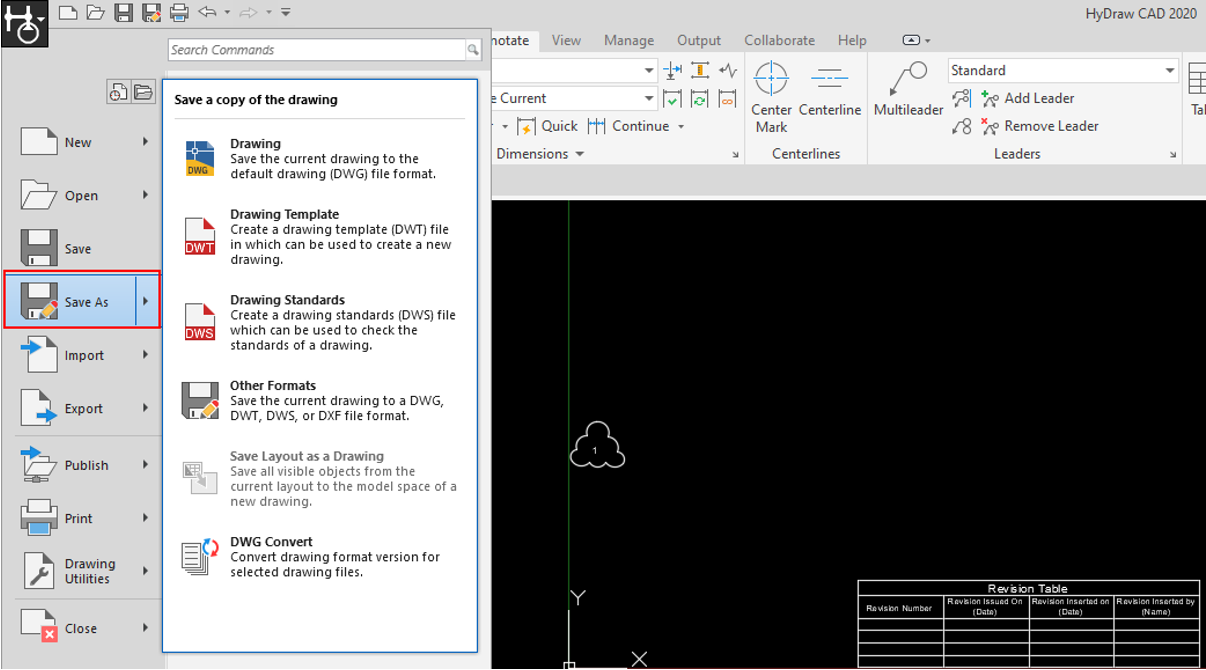
- In the dialog, select the .dwt file type, give the file name, and select Save.
9. Click OK in the following prompt.

- The Revision Table and Revision Cloud are saved in the template.
- To check, go to New, select the template you created, and click Open. It already has the Revision Table and Revision Cloud.
12. Now you can use this template for creating different drawings.