MDTools® HyDraw® Schematic interface enables you to automatically read an XML/MBXML exported from HyDraw (schematic) and insert all the required cavities with connectivity information into MDTools.
1. MDTools 785 ribbon > Insert panel > Cavity dropdown > From HyDraw
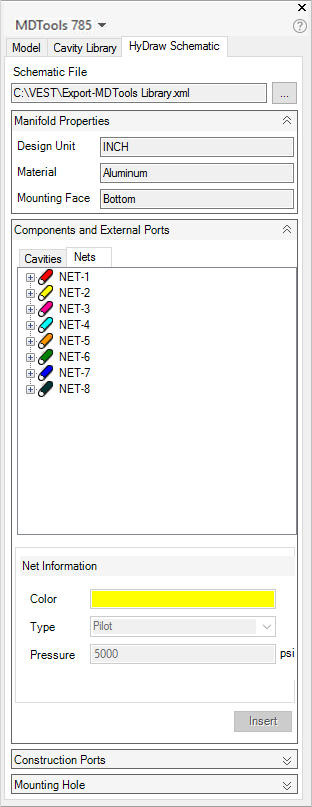
The HyDraw Schematic tab page displays in the MDTools 785 browser.
2. Browse through the Schematic files to select the required HyDraw schematic xml/mbxml file.
3. Click Open.
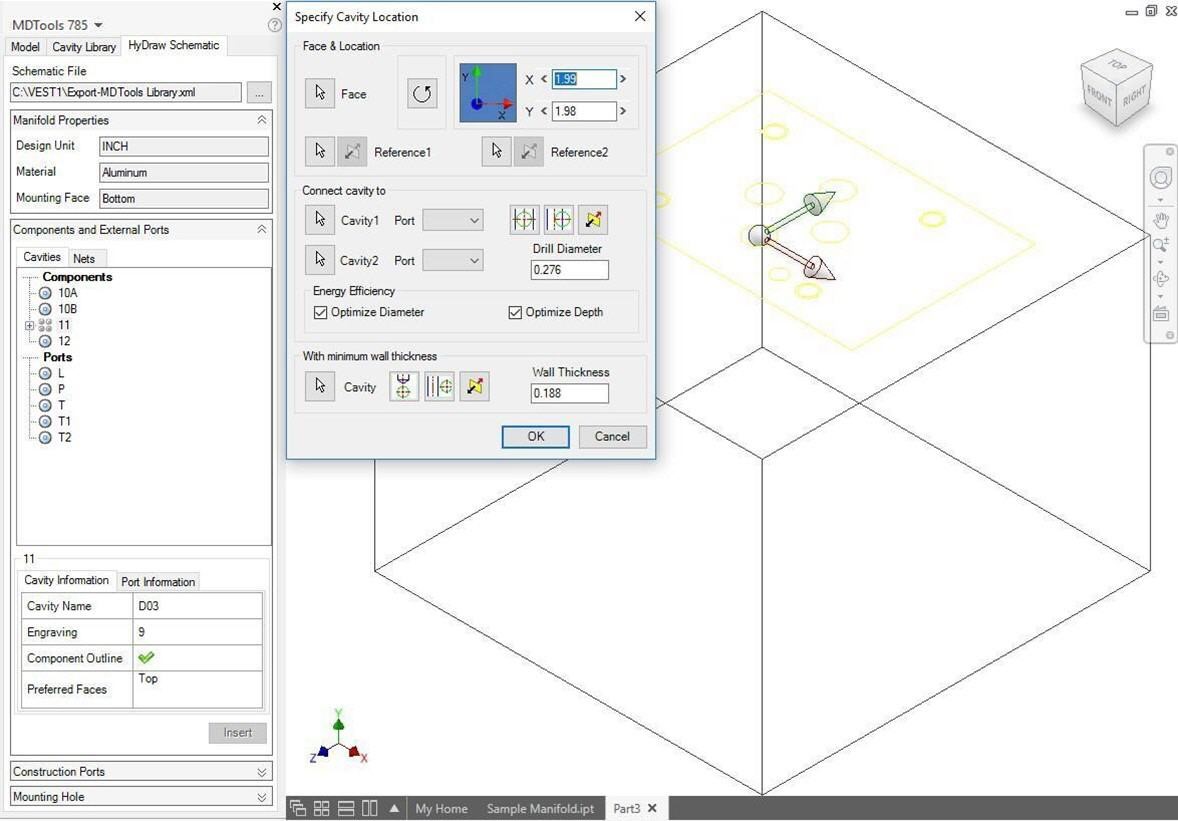
MDTools automatically populates the Cavities browser with all the components from the schematic drawing.
4. Select a component.
Note
· The cavity and port information are displayed in the respective grid.
· Cavities browser displays the cavities by the cavity ID and Nets browser displays by the net name.
· The information on engraving, component outline, and preferred faces is available only for MBXMLs imported from QuickManifolds.
5. Click Insert.
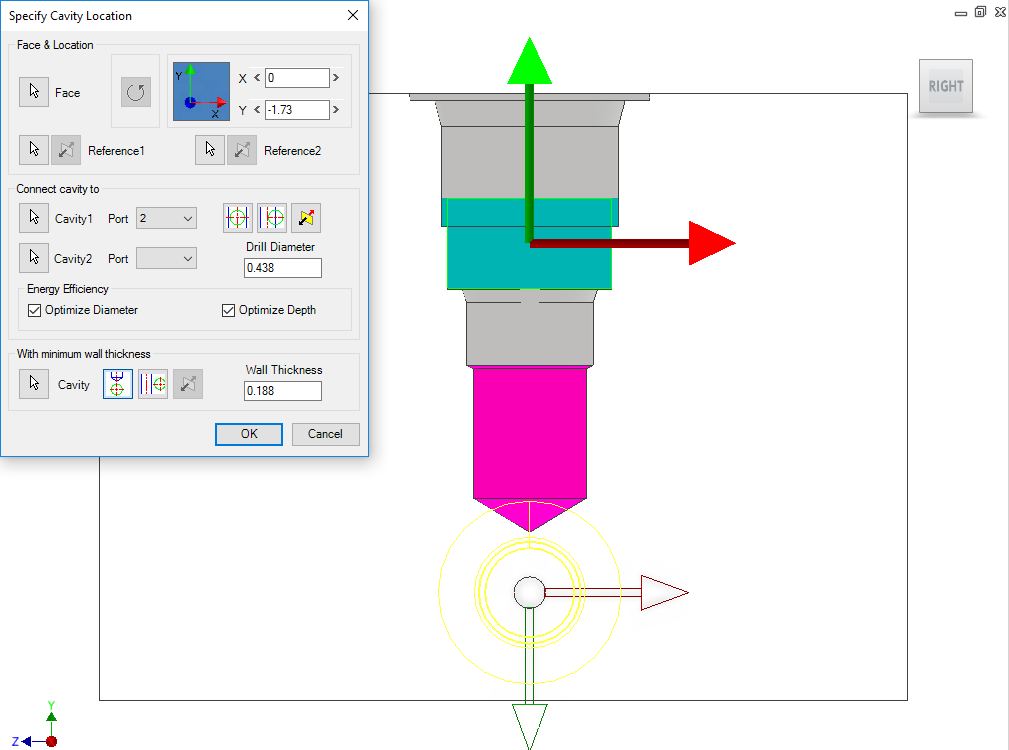
The Specify Cavity Location dialog box displays.
6. Select the point on the manifold face, where you want to insert the cavity.
MDTools® displays a top-view preview with center point and X and Y axis arrow indicator of the selected cavity at the selected point on the manifold.
7. Enter
the X and Y distance from the block origin.
Or
Drag the center point to move cavity on any axis.
Or
Drag the X and Y axis arrow to move cavity along a single direction.
8. Click OK.
The cavity is inserted at the specified location.

Footprint inserted with Cavities and Port information
MDTools automatically suppresses the blocked/terminated footprint port defined in HyDraw Schematic.
In MDTools Settings > Miscellaneous tab, select Display as Circles.
MDTools automatically displays the circle for blocked/terminated footprint ports.
Note
Once a cavity is inserted into the manifold it is displayed in black against a shaded background in the Cavities browser and Nets browser.
Refer the HyDraw Schematic page.